 webCOMAND Docs
Content Types Tutorial
This tutorial walks-through the creation of a basic database of United States presidents. It will also serve as the foundation for subsequent tutorials to create a website and web app.
Watch the video above, or follow the step-by-step instructions below.
Sign In and launch Bases
We will create the database in Content Manager, so first:
Create "Presidents" Base
To keep things organized, we will create a base to store everything for this project in one place.
- Click the New Base button.
- Enter the Title "Presidents".
- Enter the Description "United States Presidents".
- Click Create.
Create "President" Content Type
Now that we have a base for the project, we can create a Content Type and define the fields we will use to store information about each president.
- Click "New Type" in the new base.
- Enter the Title "President".
- Click Create.
Edit "President" Content Type
Now that we have created the content type, we can edit it.
- Hover over the new President Content Type and click the gear icon (Edit Type).
- On the left, click Fields.
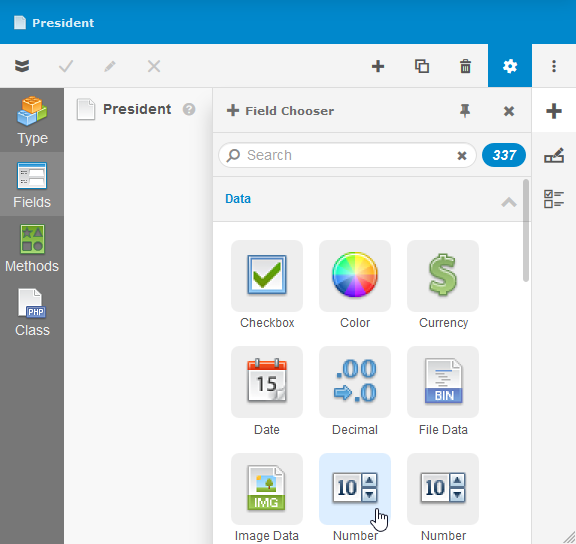 Add "Number" Field
- Click the Field Chooser (
 ) on the right.
 - Drag-and-drop the "Number" from the Field Chooser to the form.
- Enter the Title "Number".
- Click Field Options (
 ) on the right.
 - Check "Unique/Key" to indicate this field value must be unique for each president, and can be used to look up a specific president.
- Check "Show in Summary" so the Number will display in the summary for each president when displayed in a list and other views.
Add "Name" Field
- Click the Field Chooser () on the right.
- Drag-and-drop the "Text Line" from the Field Chooser to the form.
- Enter the Title "Name".
- Click Field Options () on the right.
- Check "Show in Summary" so the Name will display in the summary for each president when displayed in a list and other views.
Add "Photo" Field
- Click the Field Chooser () on the right.
- Drag-and-drop the "Image Data" from the Field Chooser to the form.
- Enter the Title "Photo".
- Click Field Options () on the right.
- Check "Show in Summary" to include a thumbnail of the photo with the Number and Name in List View and other views.
Add President Content Type Icon
We have set up everything we need to for the President content type. However, we can improve how the content type is represented by adding an icon.
- Click "Type" on the left and then select the "Labels & Help" tab.
- Upload an image to the Icon field. The image will be used to represent the content type in Tree View on the left and other views.
- Click Approve
Add Presidents
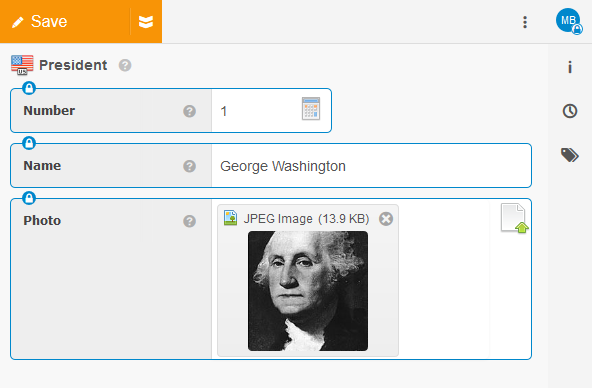 Now that the President content type has been created, we can add a few presidents.
- Click the "Presidents" on the left.
- Click New (
 ) in the right panel's toolbar.
 - Enter president information for a president and upload a photo.
- Click Approve.
- Click the New Button () on the right of the Object Toolbar and repeat steps 4-6 for an additional president.
Conclusion
We now have a simple database of a few United States presidents. We will import more presidents next.