 webCOMAND Docs
Repositories App
The Repositories App is used to maintain, backup and restore webCOMAND Repositories.
Launch Repositories
To launch the Repositories App:
- Sign In to webCOMAND.
- Click "APPS" in upper-left.
- Select "Repositories".
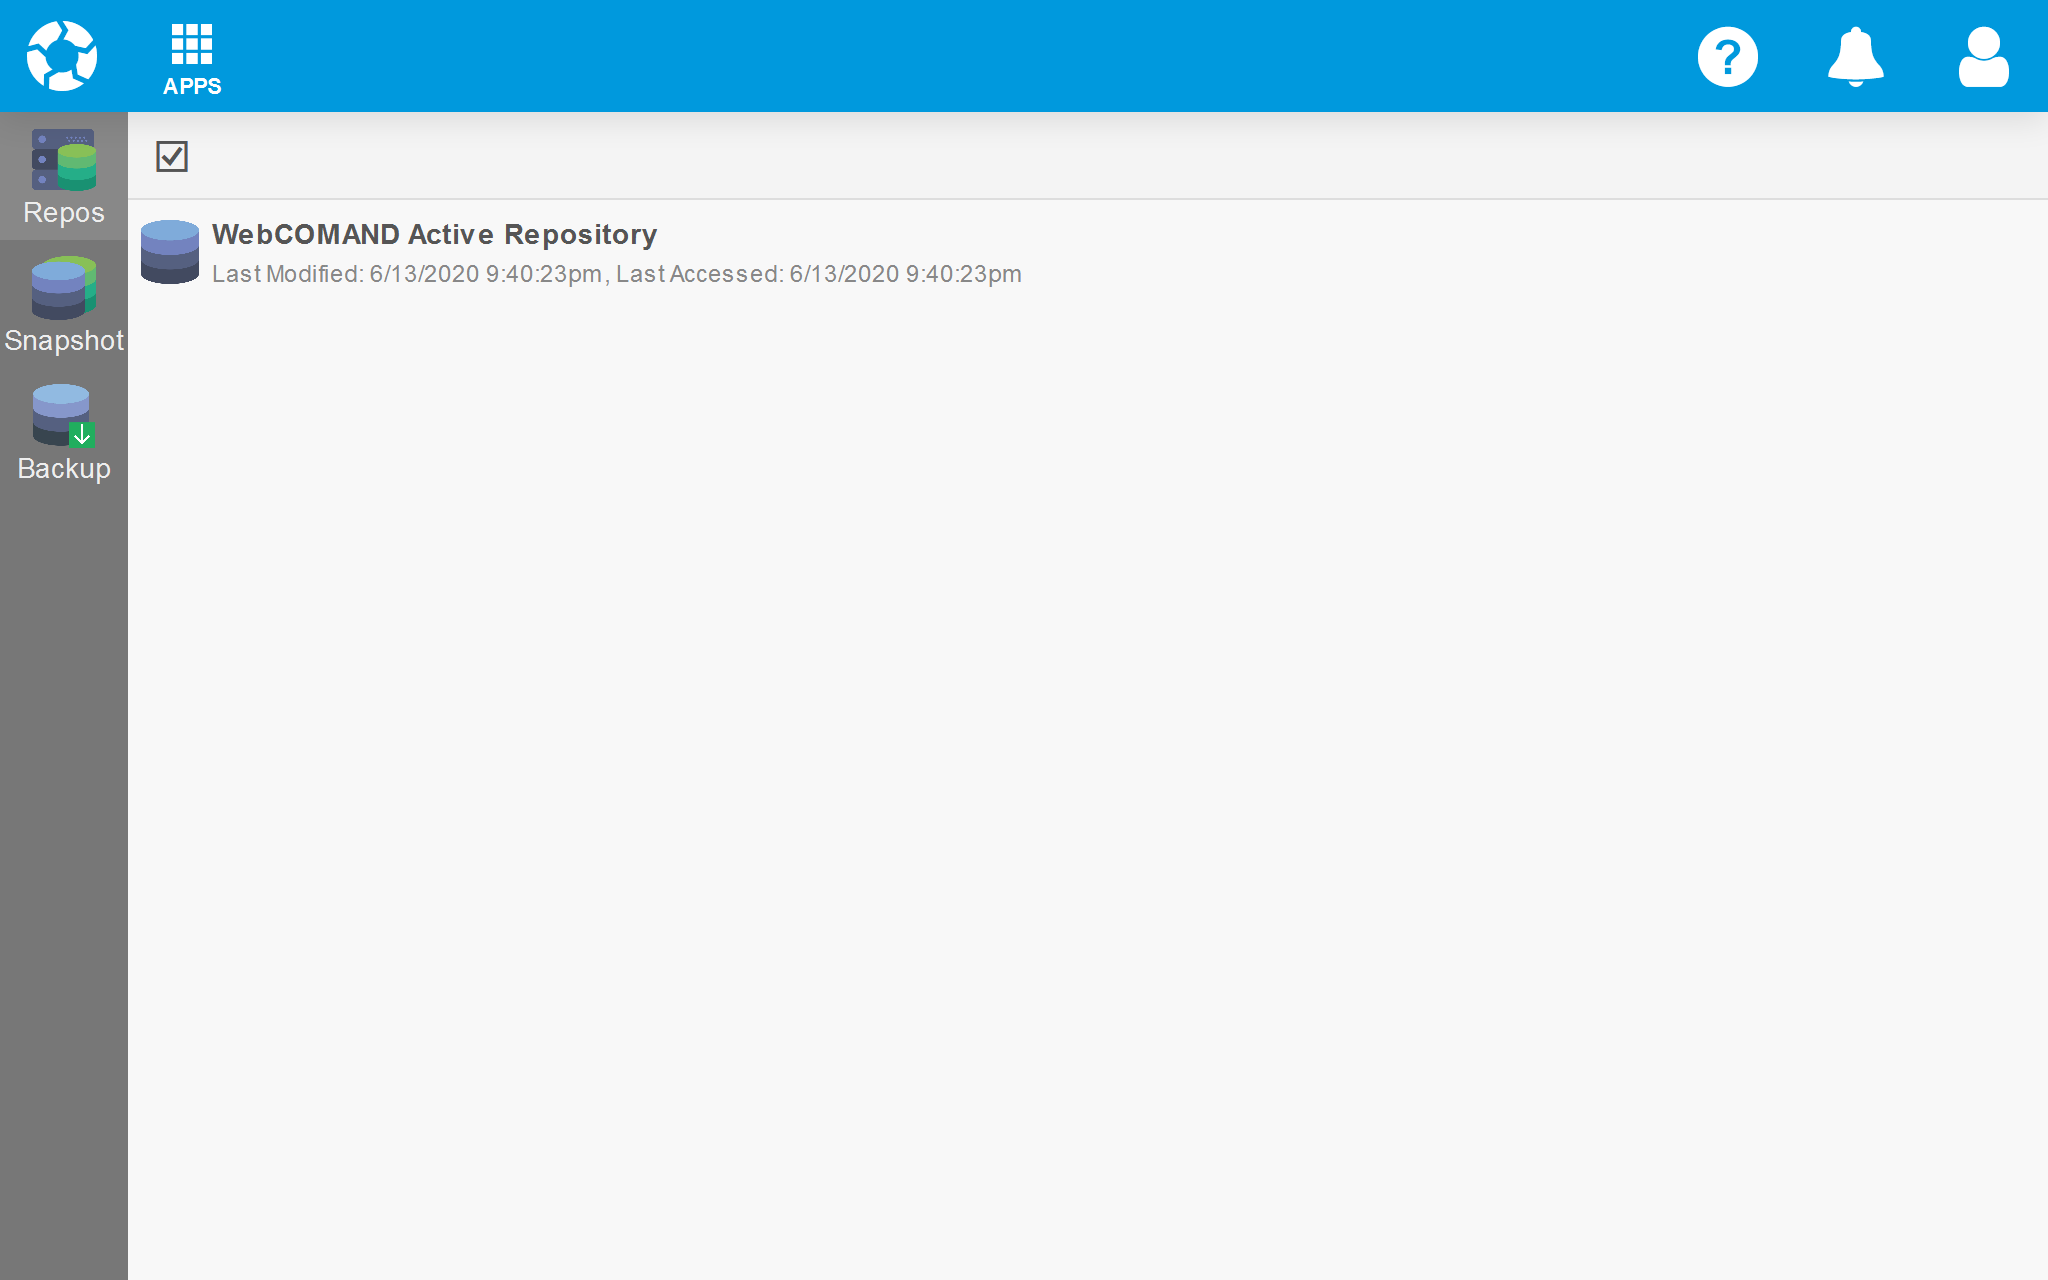
Repos
Repos will display once launched, which lists webCOMAND Repositories in the account. Typically, there is only one. Hover over a repository to reveal the following options to the right.

Diagnose
Click Diagnose to display a popup dialog with the following options.
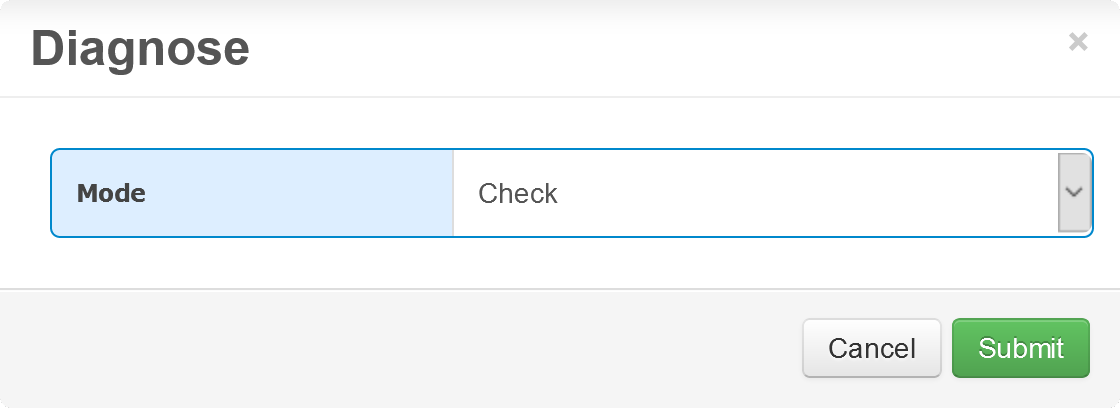
- Check - Analyze the selected repository and list any issues, but don't attempt to fix them.
- Cleanup - Reduce storage requirements by removing old Content Logs, Sessions, Content Locks, and Content Revisions that no longer reference valid objects or fall outside the retention policy defined in Version Settings. This includes past revisions that may have been retained to support a Snapshot created in the Repository App or by a Publish process, which has since been removed.
- Repair - Check the repository, fix and report on any discovered corruptions. It will automatically repeat the process until there are no more issues, or if it completes three iterations and still has issues.
- Optimize - Defragment and potentially reindex underlying storage engine structures, such as database tables and indexes.
The Check and Repair options look for corruptions and discrepancies in the repository and underlying storage engine. The following issues are checked and can be fixed.
- Orphaned Content Type Tables - Detect and remove content type tables that no longer correspond to a valid content type.
- Orphaned Content Field Tables - Detect and remove content field tables that no longer correspond to a valid field.
- Orphaned Content Field Rows - Detect and remove content field table rows (values) that no longer correspond to a value in a corresponding content type table.
- Orphaned Embedded Content - Detect and remove objects that were embedded in a parent object that no longer exits.
- Orphaned Content References - Detect and remove references from or to objects that no longer exist, or associated with fields that no longer exist.
- Orphaned Object Records - Detect and remove object records that have no corresponding object in a content type table.
- Inconsistent Object Records - Detect and resync object records and their OID, UUID and Type based on information in the content type tables. Also add any missing object Type references.
Refresh Cache
Clear and rebuild cached values in the repository, which may become corrupt or out of sync during development.
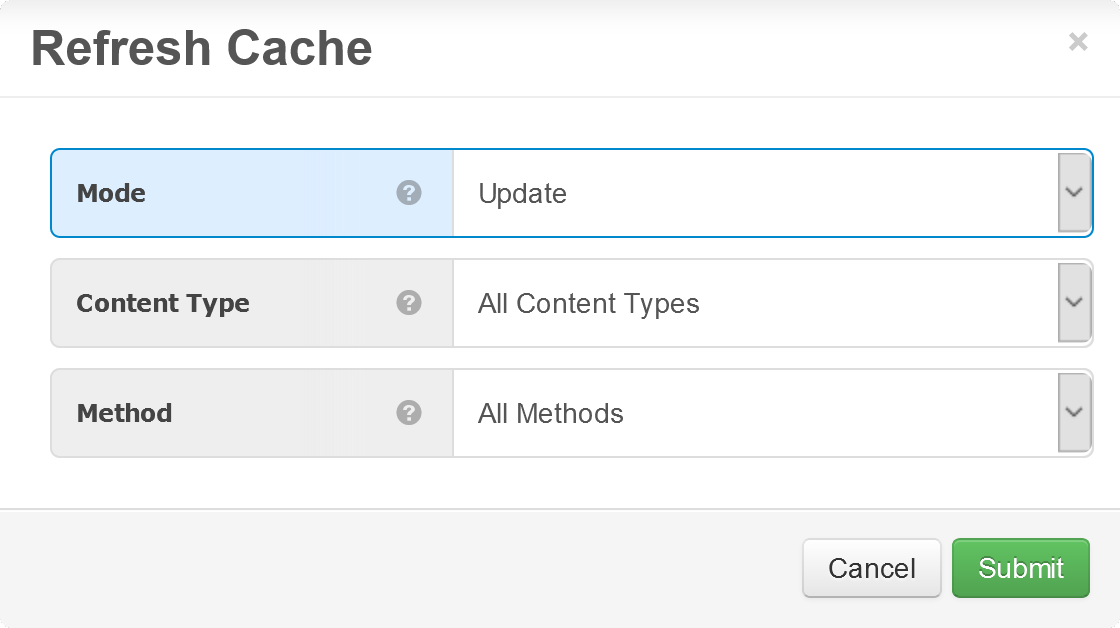
The following options are available.
- Mode - Select one of the following modes.
- Update - Process the selected Content Type and Method to populate any uncached values.
- Clear - Clear and re-populate the cached values for the selected Content Type and Method.
- Field Tables - Clears and rebuilds each content field table based on the values in the content type tables. This information is critical to the query engine and must be maintained at all times.
- Content Type - Select the Content Type to process. If nothing is selected, all content types will be processed.
- Method - Select the Method to process. If nothing is selected, all Methods will be processed. For more information about the specific Methods, see cTemplate Methods.
Snapshots
The Snapshots menu option is used to manage repository snapshots, which retain a version of all content in the repository as it existed at a given time. This ensures all content can be accurately temporarily queried for results at the corresponding point in time, and can be reverted to a version from that point in time, even if content is not configured with version control.
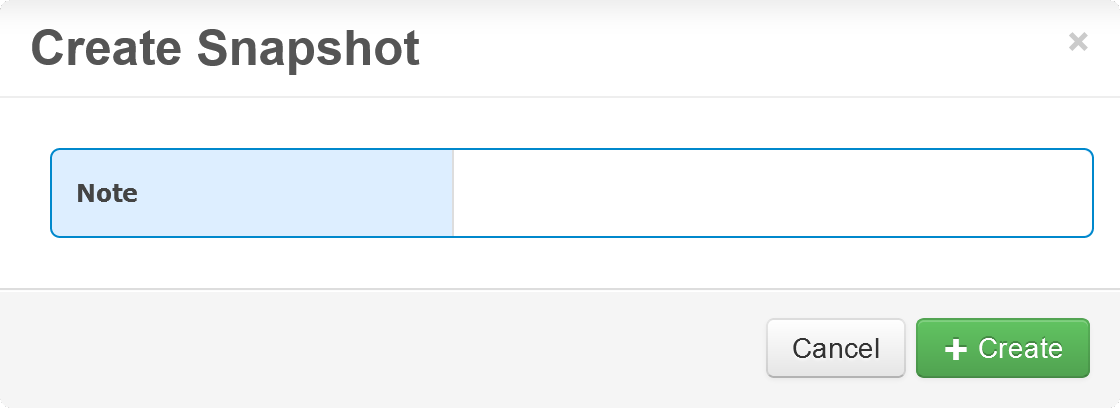
Add Snapshot
To add a new Snapshot, click "+" and enter a Note to describe the Snapshot for future reference.
Unlock/Remove a Snapshot
To remove a Snapshot, hover over the Snapshot and click the unlock option to remove it.

Content revisions retained for the Snapshot will not be removed immediately. Instead they will be removed next time a Repository Cleanup is run, which is typically scheduled to run every 4 hours.
Revert/Restore Snapshot Content
To restore content of one or more Content Types to the revision that existed at the time of the Snapshot, hover over the Snapshot and click the restore option. Optionally, select the desired Content Type to restore. All content of that type will be reverted to the latest revision at the time of the Snapshot.

The Restore option can be handy, but Snapshots are more typically used to ensure content revisions at the time of the Snapshot are retained for individual restore, from the Version Sidebar.
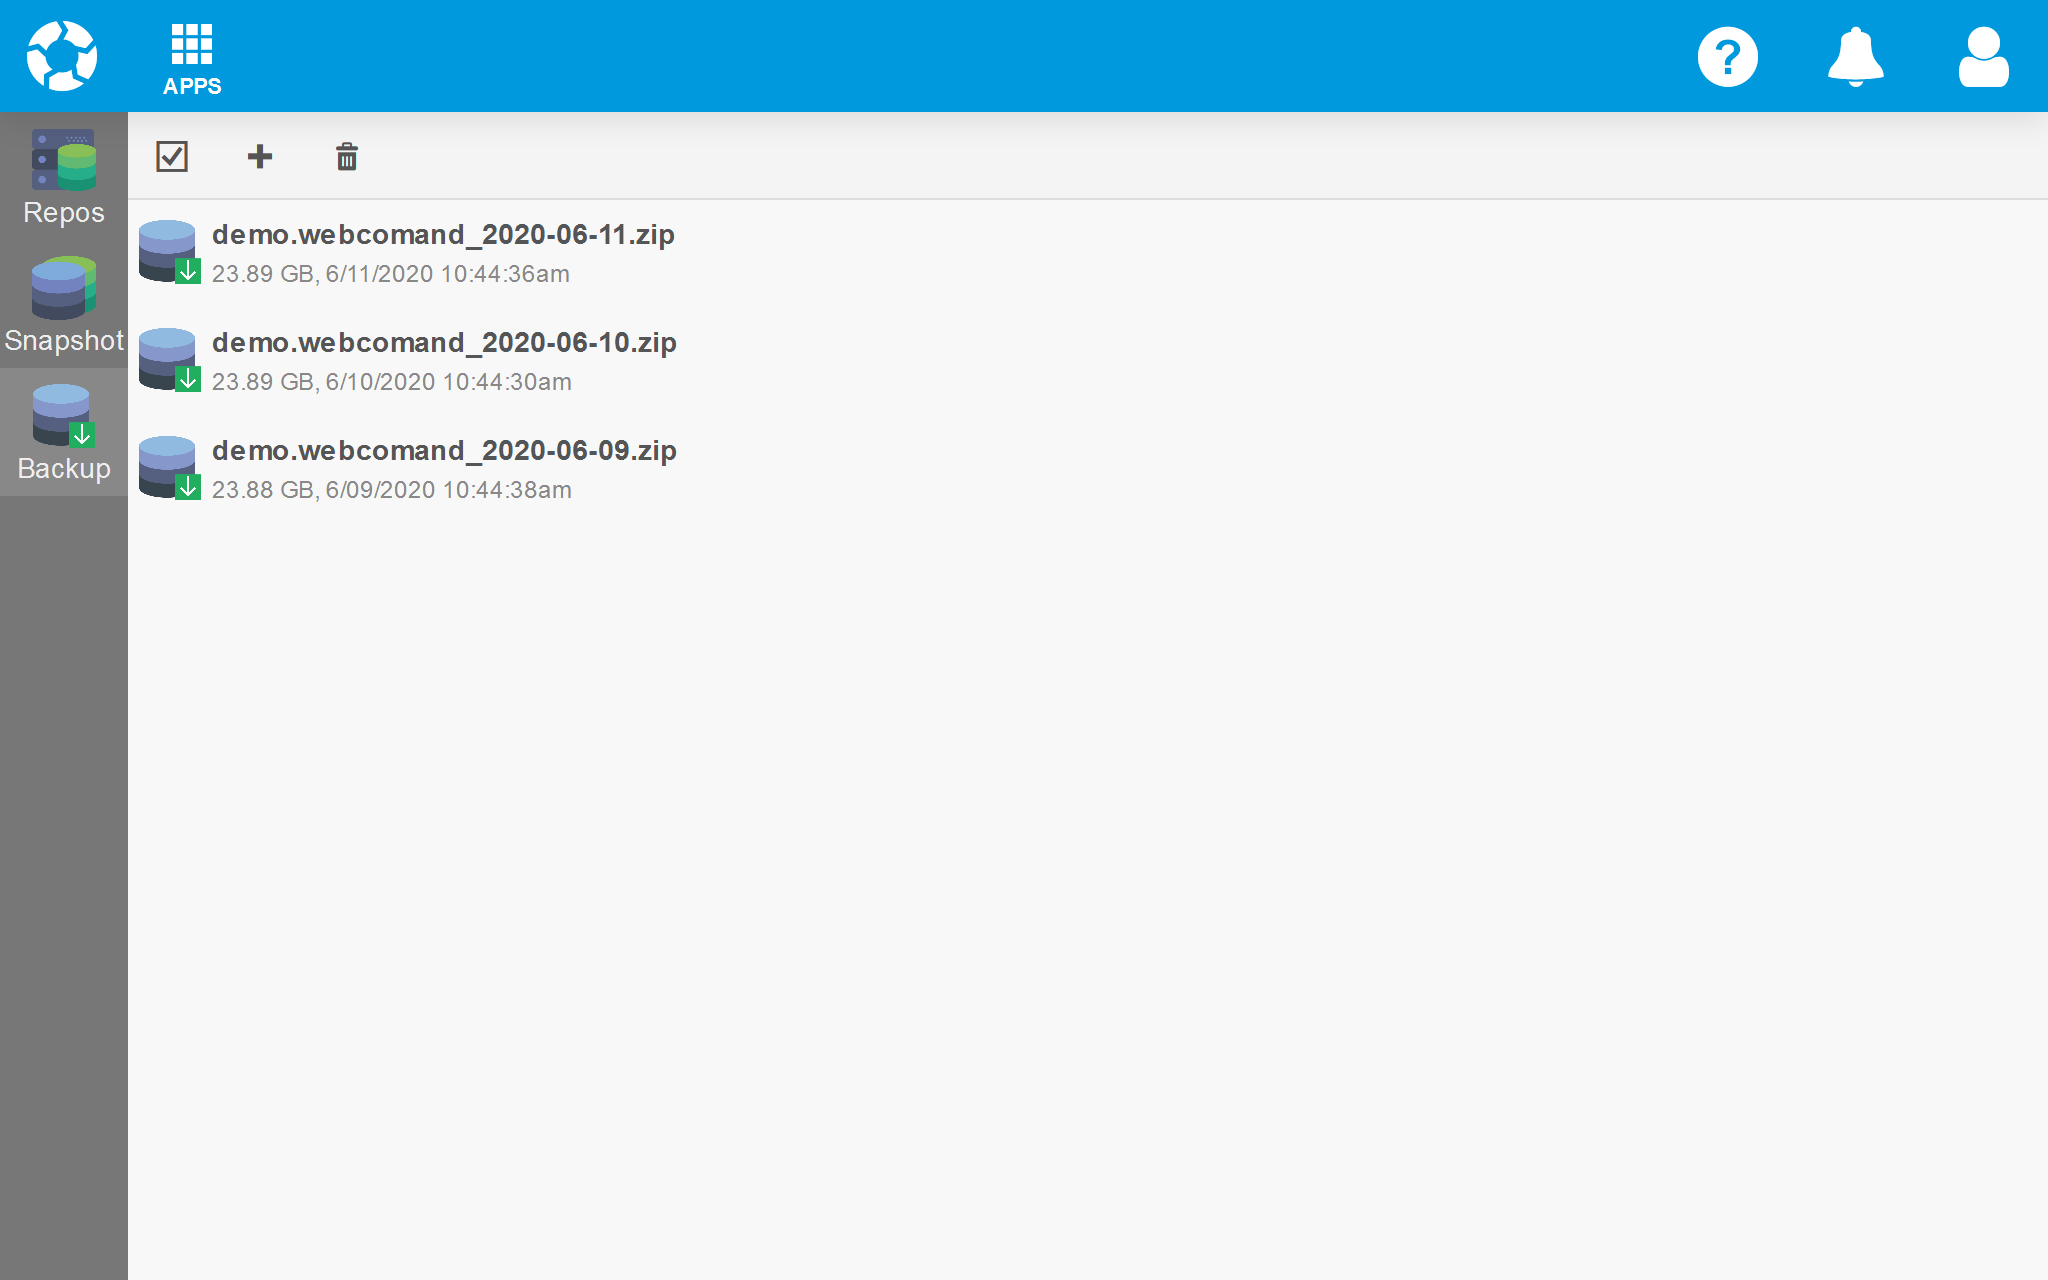
Backups
The Backups menu option will display repository backups with options to create a new backup, and restore and remove previous backups.
Add Backup
Click the "+" button at the top to create a new backup of the repository in its current state. The backup will be retained until the automatic backup process determines it should be removed.
Restore Backup
To restore an existing backup, hover over the backup and click the restore option to the right. The backup will be restored, replacing all data in the repository. It may be a good idea to first create a new backup from the current repository before restoring another backup, in case you want to revert the repository data back to what was there before the backup was restored.

The restore process follows the steps below.
- Restore backup to temporary storage - Restore the backup to a temporary restore area within the storage engine. This allows the system to remain online during the majority of the restore process, and to remain online without interruption or data loss if there are any issues during the restore process. For relational database storage engines, this means creating tables with a special restore prefix in the table name. The Notifications & Tasks Sidebar will display a Restore Backup System Task with progress as the backup is restored.
- On failure, recover - If a critical error occurs, the error is reported to the Restore Backup System Task and the temporary restore area is removed.
- On success, activate - If no critical errors occur, the active and temporary restore areas within the storage engine are swapped, and the old active area is removed. Finally, the Restore Backup System Task is written to the new active repository, so information about the restore process persists after the backup is restored.
Updates made to the active repository during the restore process will be lost. To prevent updates during the restore process, deactivate the repository beforehand.
Remove Backup
To delete an existing backup, hover over the backup and click the remove option to the right.

Download Backup
To download an existing backup, hover over the backup and click the download option to the right.
Upload Backup
To upload a backup, drag-and-drop the file from your computer to the list of downloads, or:
- Click the Upload button in the top toolbar.
- Click the drag-and-drop target over the list of downloads.
- Open the backup file to upload from your computer or attached network drive.