 webCOMAND Docs
Rich Text Images

It is possible to add, style and edit images in the Rich Text Editor.
Add an Image
There are a couple of ways to add an image in the Rich Text Editor.
Drag-and-Drop
The easiest way to add an image from your desktop or laptop computer is to simply drag-and-drop the image from the desktop or a folder on your computer directly into the Rich Text Editor area.
This will upload the image into webCOMAND, where it can be managed and referenced, like any other content. The Rich Text field configures where and how the image is stored. That is, Content Type is used to store the image and related information, and what folder it is stored in. By default, the Image Media File content type will be used, and it will be stored in the same folder as the content with the Rich Text Editor field.
Image Toolbar Option
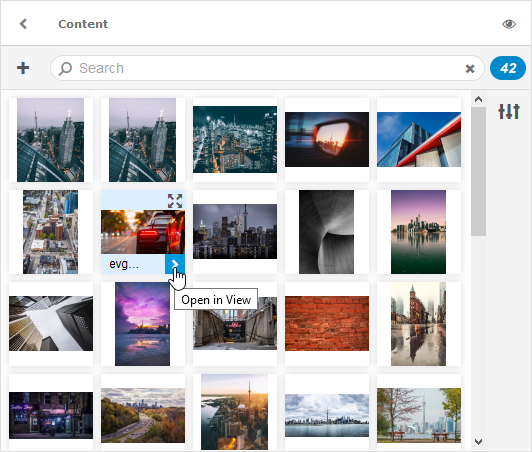
Images already uploaded to webCOMAND can also be added into the Rich Text Editor from the Image option in the toolbar (outlined in green at the top of this page).

To add an image already uploaded from the Image Properties popup:
- Click the desired Content Type from the left.
- Select the desired image on the right.
- Click OK at the bottom-right.
Style an Image
Once an image is added, it can be styled to adjust the size and layout within the text, including if and how text will flow around the image.
To adjust an image's style:
- Click the image.
- Select the desired style from the Styles drop-down in the upper-left of the Rich Text Toolbar.
The styles available in the drop-down are configured by a developer.
Edit an Image
Once an image is added, there are a number of options to customize it.
Replace an Image
To replace an image with a different image:
- Double-click the image, or right-click and select "Image Properties".
- Click the desired Content Type from the left.
- Select the desired image replacement on the right.
- Click OK at the bottom-right.
Add Alternate Text
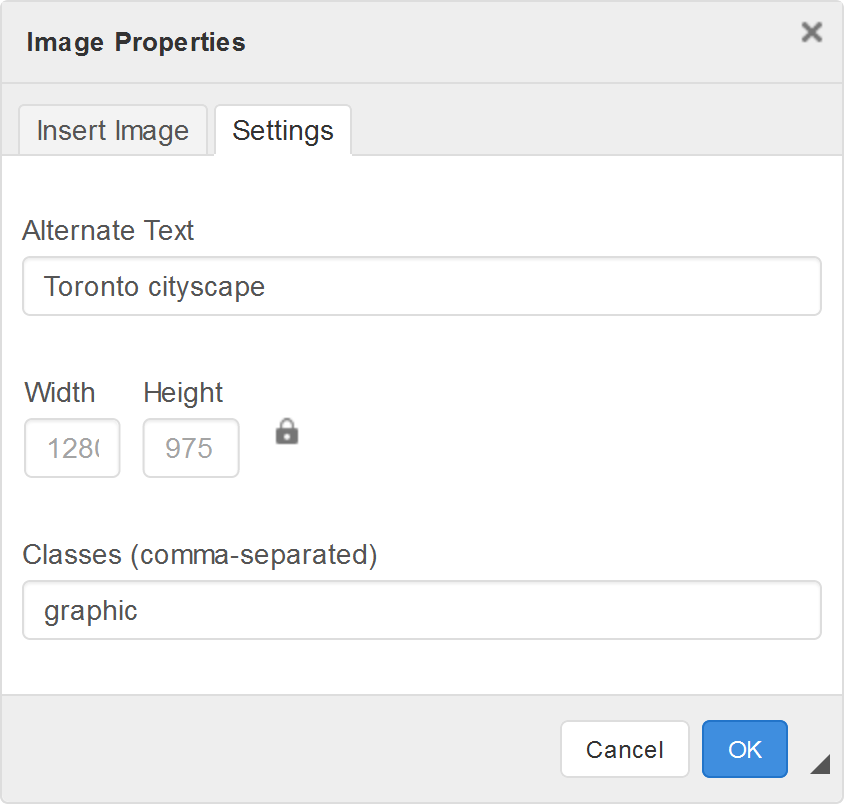 To add alternate text for accessibility (ADA compliance), search engine optimization (SEO), and for display when the image is not yet downloaded or can not be displayed:
- Double-click the image, or right-click and select "Image Properties".
- Click the "Settings" tab in the popup.
- Enter the Alternate Text.
- Click OK.
Resize Image
Some web browsers, such as Firefox, support visual image resizing. First, click the image to select it. If supported, a small square will display in the four corners and four edges of the image. Click and drag one of the rectangles to resize the width, height or both.
Specify Exact Image Dimensions
To adjust the image width and/or height to exact sizes, or if your browser does not support visual resizing:
- Double-click the image, or right-click and select "Image Properties".
- Click the "Settings" tab in the popup.
- Enter the desired width and/or height. Click the small lock icon to lock the aspect ratio and automatically adjust the other dimension proportionally.
- Click OK.
Edit Image Details
 To edit the image content fields:
- Double-click the image, or right-click and select "Image Properties".
- Hover over the selected image on the right.
- Click the open option (>).in the lower-right of the tile.
- Update any desired fields.
- Click Approve and OK at the bottom-right.