 webCOMAND Docs
Web Services Tutorial
This tutorial builds on the Content Types tutorial to illustrate how to get, put and delete objects in a COMAND repository from remote code and applications.
Getting Started
In order to access and update a COMAND repository from remote code, the Web Services Login Policy must be installed and a valid User Token added.
Install Web Services Login Policy
The Web Services Login Policy must be installed before a User can be assigned access to Web Services and associated with a User Token.
- Launch the Content Manager (CMS) App.
- In the folder tree on the left, click the System folder.
- Click import (
 ) in the toolbar at the top of the right panel.
 - Click "From URL" and enter:
file:///var/www/webcomand/packages/io_comand_webservice/install/login.js - Click Import.
Add a Web Service User and Token
Once the Web Services Login Policy is installed, a User and User Token can be created to provide controlled access to the repository.
- Launch the Users App.
- Add a new User with the authorizations required to access and update content as needed.
- Click Add (
 ) in the top-left.
 - Enter a Username like: ws_user
- Enter your Email.
- Click the Manage tab.
- Check "Active"
- For the Login Policy, uncheck "webCOMAND Login Policy" and check "Web Services Token Authentication Policy".
- Click the Authorizations tab.
- If this is just a test account, simply check System Administrator.
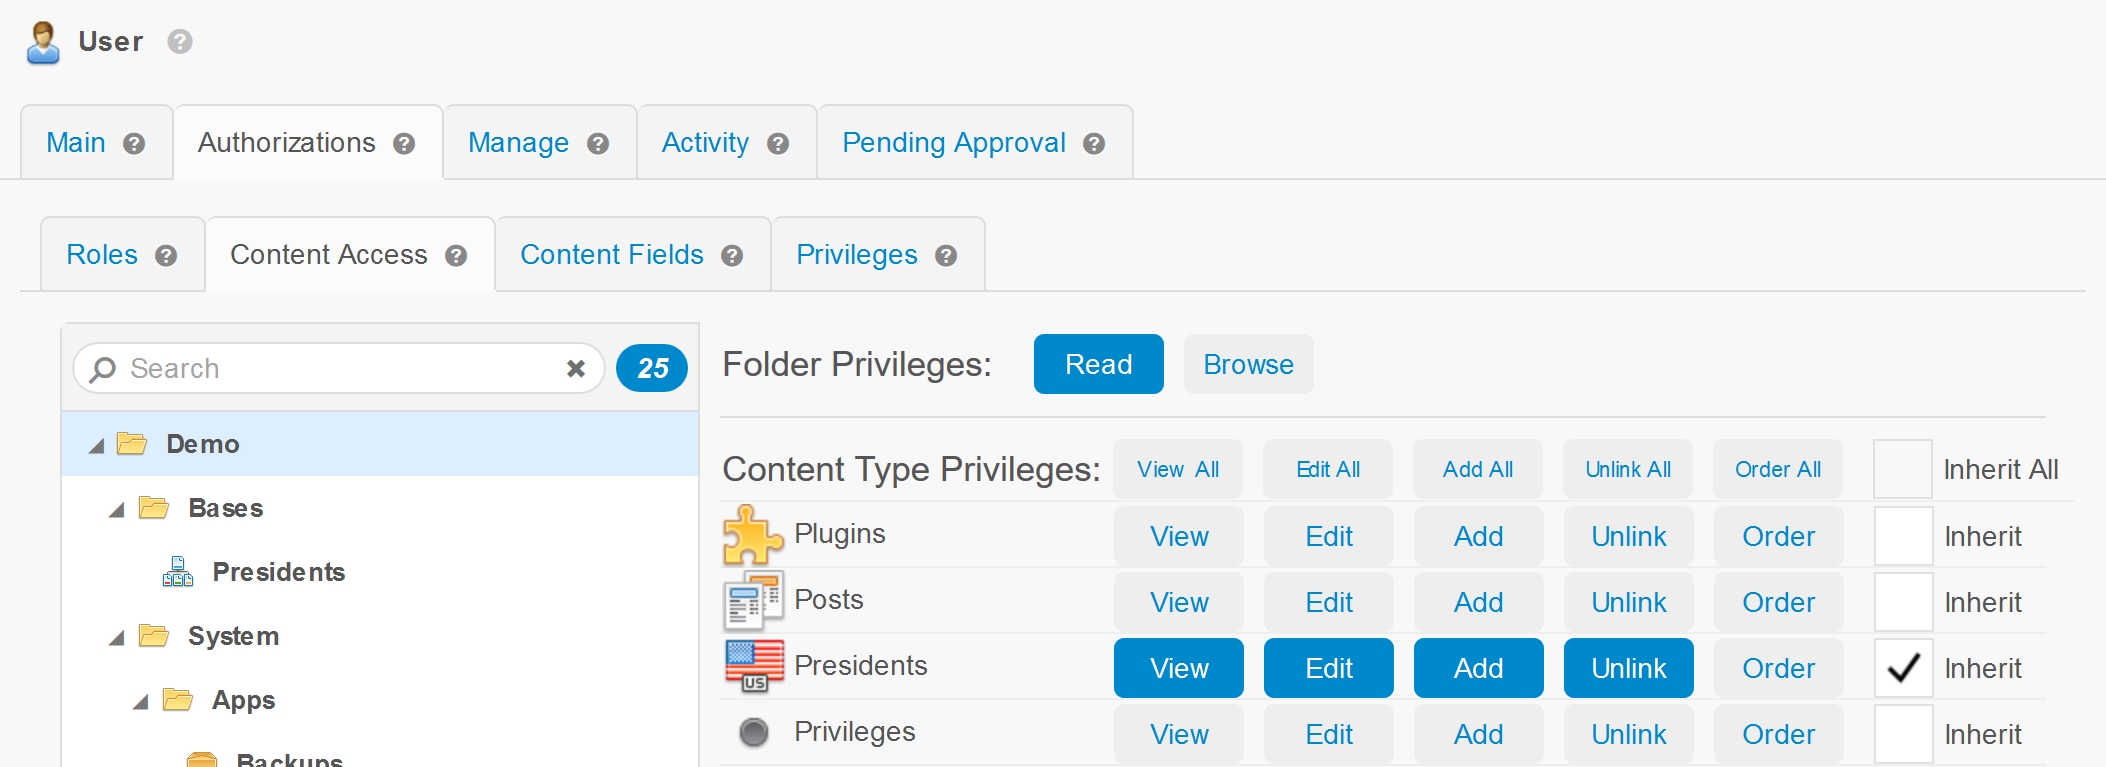
- If security is a concern, select appropriate User Roles, or assign specific Content Access and Privileges. For this tutorial, make sure the user has the following authorizations.

- Read Folder Access to the root folder.
- View, Edit, Add, Unlink and Inherit Content Type Access to desired content types within the root folder. Inherit applies access to content in all subfolders, as well as content not in a folder. For this tutorial, we will provide access to Presidents.

- Capabilities, Delete, Get and Put Services for COMAND Core Web Services Call Privileges.
- Click Approve.
- Click Add (
- Add a User Token for the new user.
- Launch the API App.
- Open a new Web API Call > Get Service.
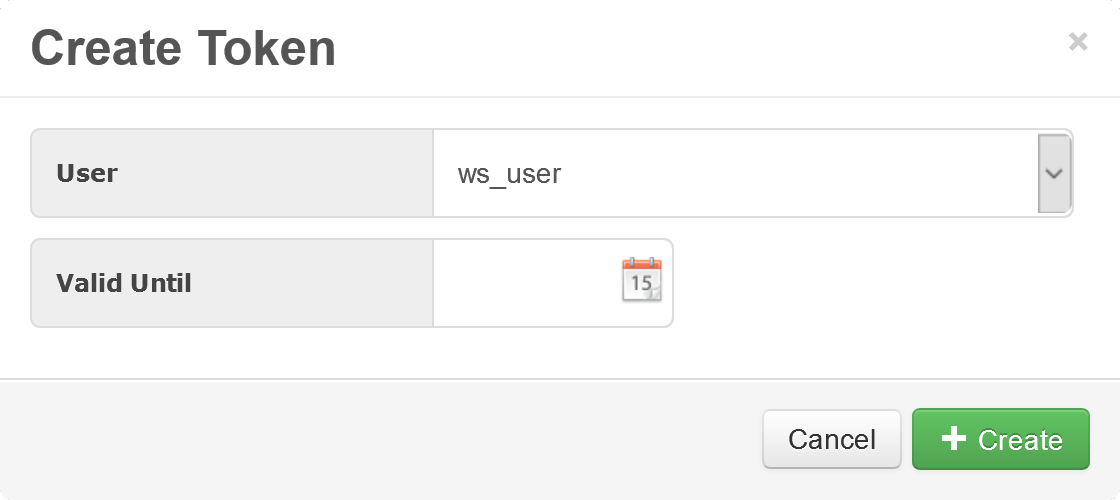 Click the Create button to the right of the Token option.
- Select the User created in the previous step.
- Click Create.

Get Web Service
The Get Web Service is used to query a repository and access content. You can use the API App or Postman to easily test the Get Web Service.
API App
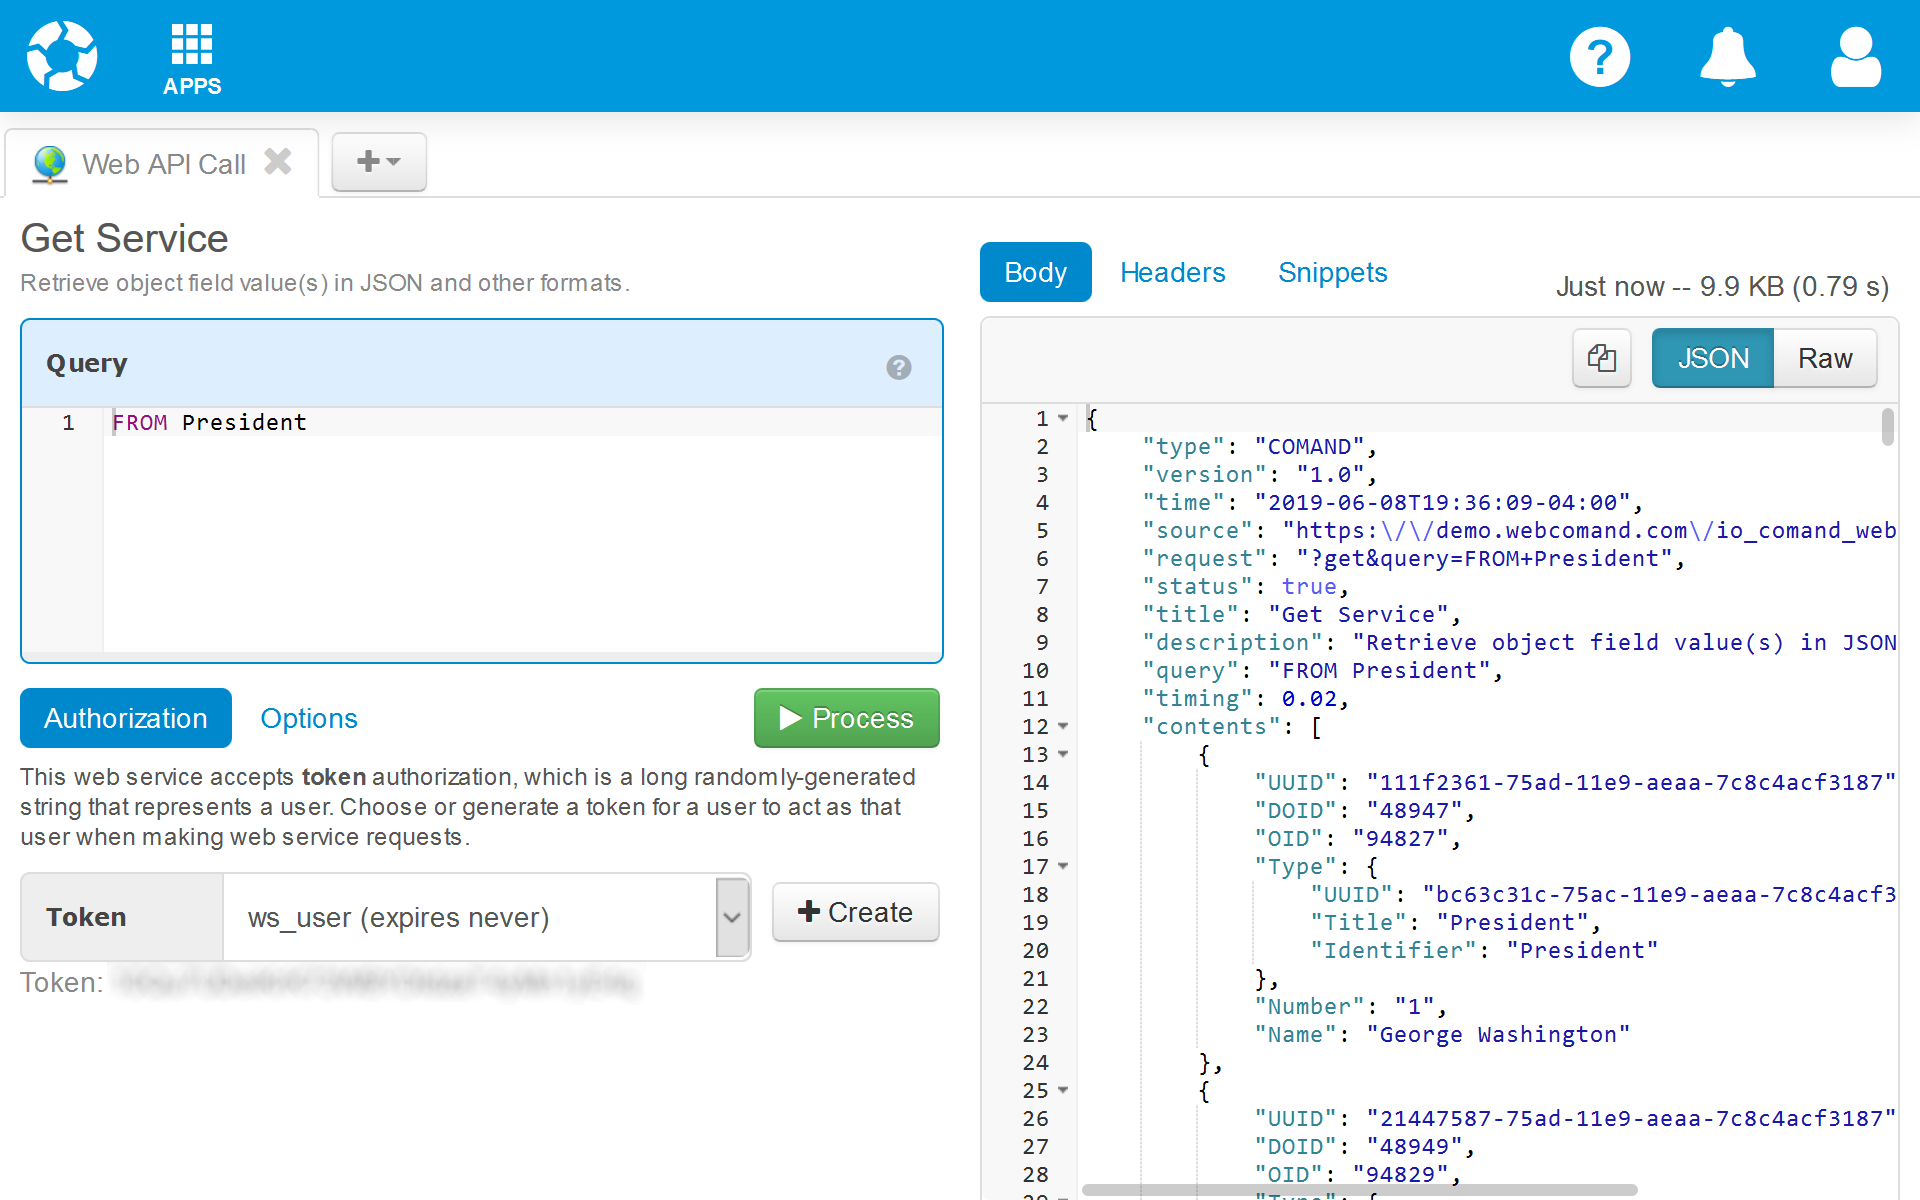
- Enter the Query:
FROM President - Click Process.
The web service response JSON will be displayed to the right. Notice the default (non-image and file) fields and metadata in the results.
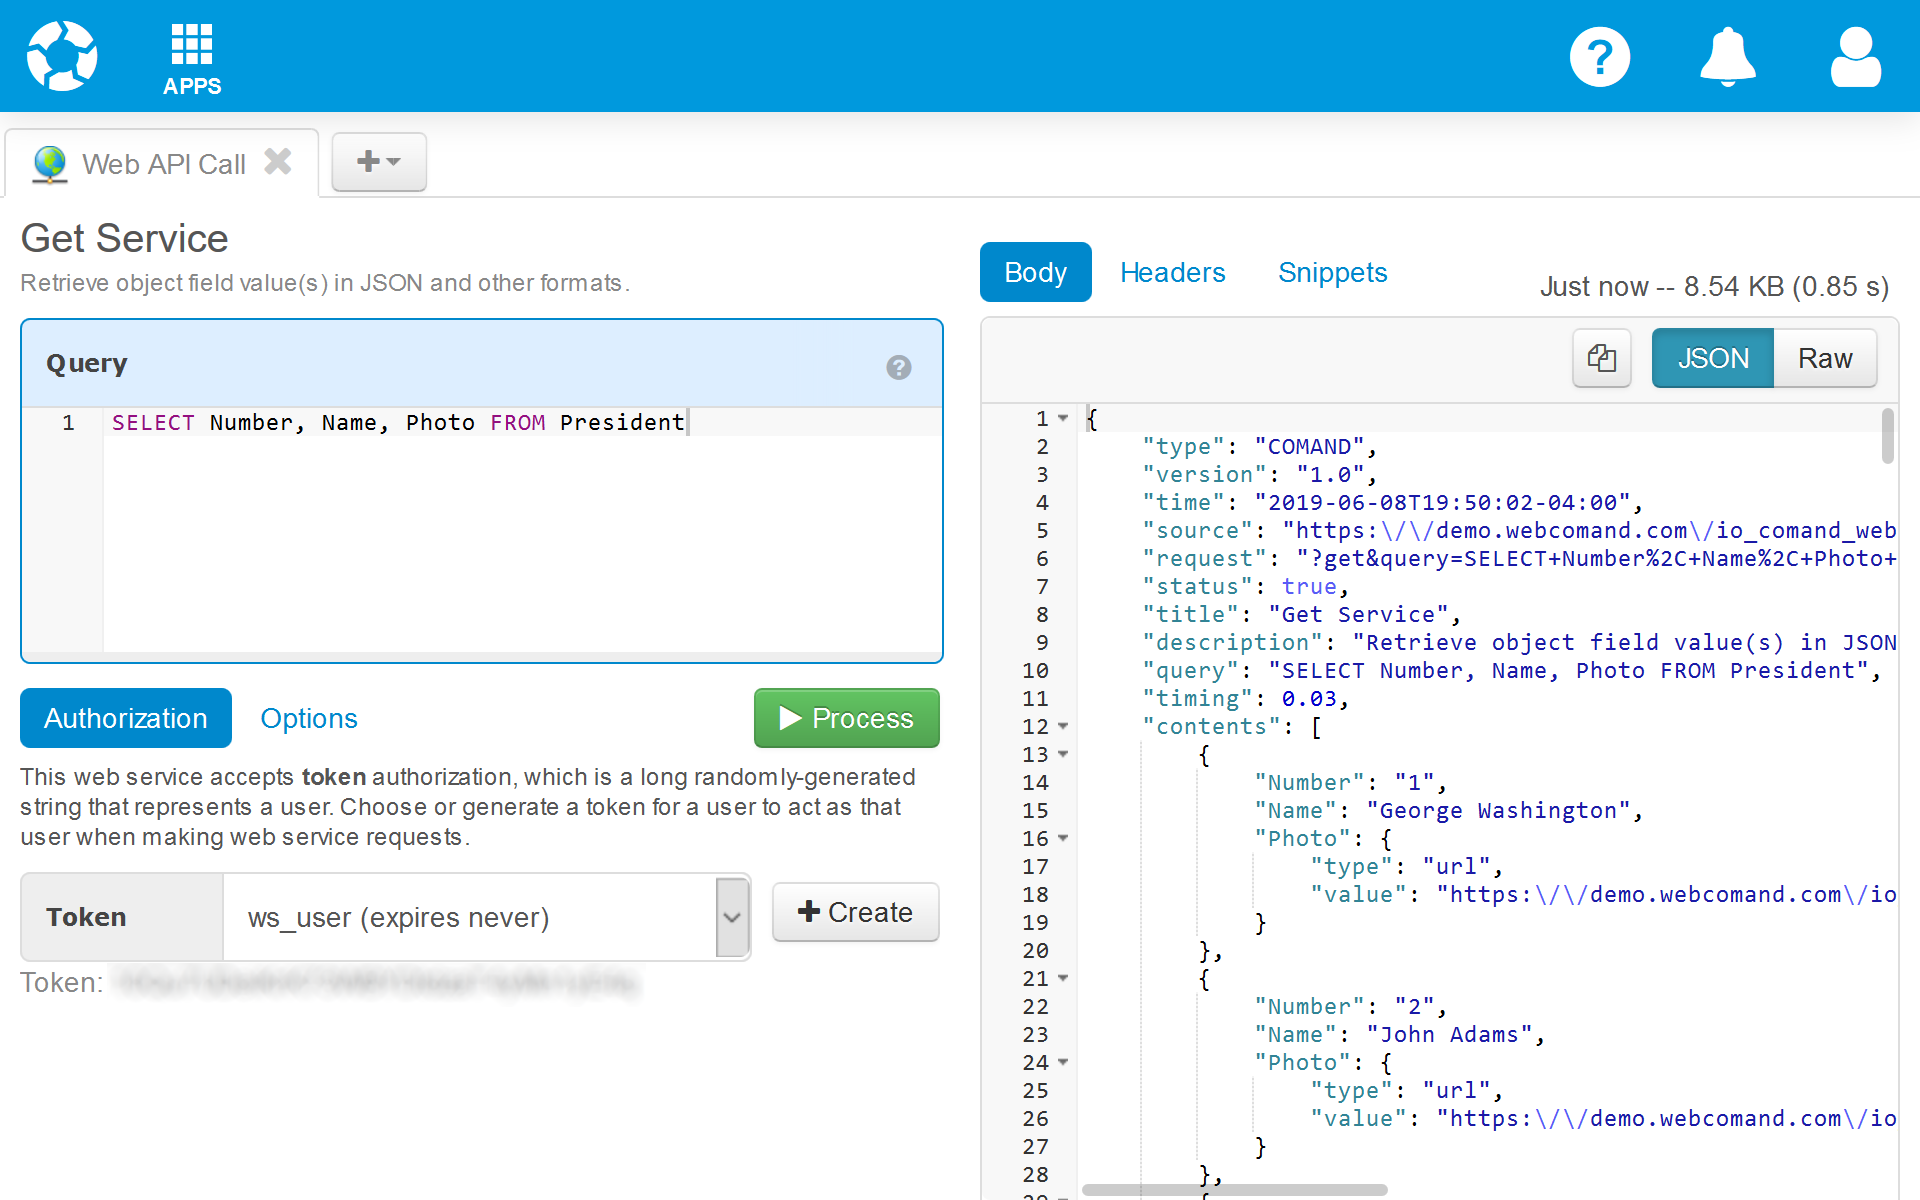
To refine the results, add a SELECT clause to the query.
- Update the Query:
SELECT Number, Name, Photo FROM President - Click Process.
Notice only the selected fields are included in the results.
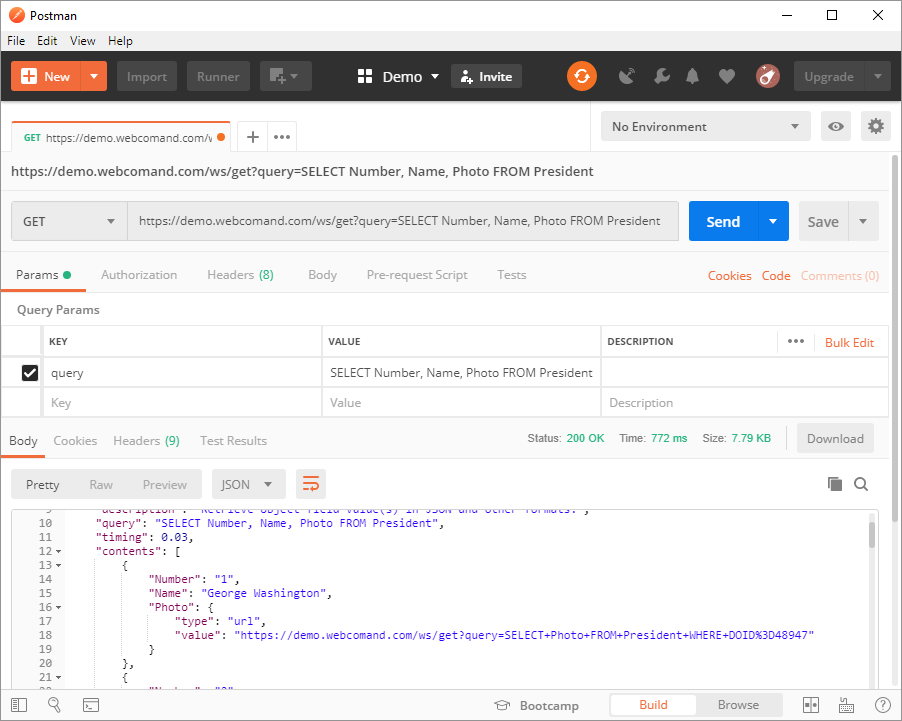
Postman
To query the Get Web Service from your local computer, you can use any programming language, front-end framework, wget, curl or an app like Postman . We'll use Postman for a more visual example here, but the same information applies to all options.
- Launch Postman.
- Open a request tab.
- Enter the GET URL (replace <account> with your account):
https://<account>.webcomand.com/ws/get - Enter the Query Parameter Key:
query - Enter the Query Parameter Value:
SELECT Number, Name, Photo FROM President - Click the Headers tab.
- Enter the Header Key:
Authorization - Enter the Header Value (replace <token> with your token):
Token <token> - Click "Send".
Put Web Service
Use the Put Web Service to add and update content to the repository. We will use the API App here, but you can use any tools described above here as well.
- Switch back to webCOMAND in your web browser.
- Click New Tab and select Web Service > Put Service
- Enter cJSON into the Data field. For example:
{ "type": "COMAND", "version": "1.0", "contents": [{ "Type": "President", "Number": "45", "Name": "<Your Name>", "Photo": { "type": "url", "value": "https://www.webcomand.com/docs/img/help/profile.png" } }] } - Select the Token created in the previous section.
- Click Options and enter the Parent "/Bases/Presidents".
- Click Process.
The response JSON will be displayed to the right. Notice the OID of the new President is included in the response.
Delete Web Service
Use the Delete Web Service to remove content from the repository. We will use the API App here, but you can use any tools described above here as well.
- Click New Tab and select Web Service > Delete Service.
- Enter the Query:
FROM President WHERE Number=45 - Select the Token created in the previous section.
- Click Process.
The response JSON will be displayed to the right.